Thursday, March 31, 2011
Peanut Butter Granola
Happy (almost) weekend, everyone! I don't know about you, but I sure am ready for a few days to relax with Joey and Nut. Joey has business in Des Moines on Monday morning so he will be staying with me a little longer than usual, and it means we get to have a Sunday night together. I'm ridiculously excited.
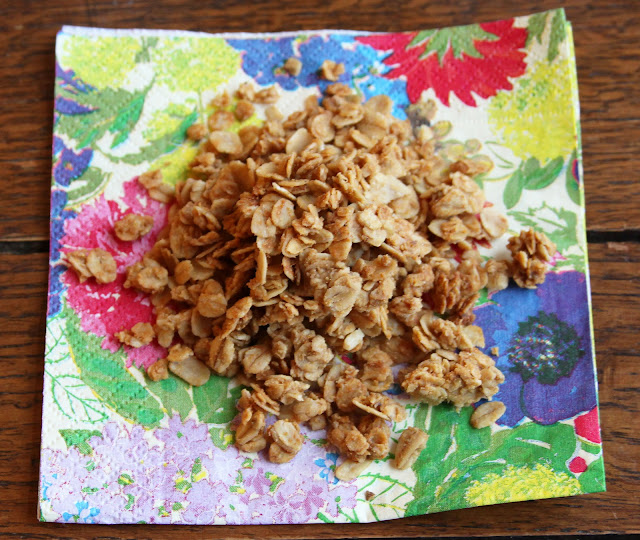
I thought it was also high time for me to share what I've been eating for breakfast the last couple weeks. Last week, after seeing Jenna's post about granola, I was compelled to make some of my own. Of course, I decided to forgo using a recipe and just stick with equal parts butter, oil and honey. I realize that Granola is typically made with regular rolled oats, but I made this granola with a combination of regular rolled oats and the quick-cooking variety. It would be great if I could say it was for creativity's sake, but truthfully, I ran out of rolled oats.
The good news? Quick-cooking oats made a fabulous substitute. Although I wouldn't recommend using 100% quick-cooking oats, the mix worked out well. And you know me, if you put peanut butter on something I'll follow you around and love you forever. I've been enjoying my granola served with an ice-cold glass of 2% milk and chopped walnuts.
P.S. - How cute are these two?
Peanut Butter Granola
Ingredients
*1 2/3 cup rolled oats
*1 2/3 cup instant oats
*1/3 cup peanut butter
*1/3 cup vegetable oil
*1/3 cup honey
*Serve with milk (I vote for 2%) and chopped walnuts
Instructions
*Preheat oven to 275°F. In a large bowl, combine the oats. In a small bowl, whisk together the peanut butter, vegetable oil and honey. Stir until well combined.
*Pour peanut butter mixture over oats and stir until oats are evenly coated. Spread evenly onto baking sheet. Bake for 40 to 50 minutes, until lightly golden and toasted, stirring once halfway through baking. Cool completely and store in an airtight container.
Happy Cooking!
Madison
Labels:
breakfast,
granola,
peanut butter
ABC's of Me
A. Age: 23
B. Bed Size: Queen bed that my mom bought me when I graduated from college. It is so darn comfy!
C. Chore You Dislike: Putting away clean clothes. I don't mind washing and folding, just putting away.
D. Dogs: Nutmeg, age 4
E. Essential Start to Your Day: Putting my contacts in and starting the day with a cup of coffee
F. Favorite Color: Light blue
G. Gold or Silver: I'm a silver girl for the most part, especially since my engagement ring is platinum.
H. Height: 5'10 I've been the same height since freshman year of high school
I. Instruments You Played: Piano from age 6 to 17, violin for a couple years, and trumpet from 5th grade until high school graduation
J. Job Title: Creative Services Food Editor for Meredith Integrated Marketing
K. Kids: Not for quite a while!
L. Live: Des Moines, Iowa
M. Mom's Name: Marilyn
N. Nicknames: Most people just call me Madison, but some call me Madi
O. Overnight Hospital Stays: Nope!
P. Pet Peeves: Double negatives, bad manners, people who are unaware of current events, slow walkers (especially at the mall!)
Q. Quote From a Movie: "Tiffany's, I'm just crazy about Tiffany's. If I could find a real life place that made me feel like Tiffany's, well then, I would buy some furniture and give the cat a name!" - Audrey Hepburn in Breakfast and Tiffany's (not sure why, but I just love it)
R. Righty or Lefty: Lefty and proud of it!
S. Siblings: Two younger sisters, Ashley and Taylor, and my soon-to-be siblings Amber, Jake and Jason
T. Time You Wake Up: Between 5 and 5:30 am
U. Underwear: ? Yes, I wear them.
V. Vegetables You Don't Like: Kale and Swiss Chard
W. What Makes You Run Late: Having a tough time picking out an outfit, trying to photograph a recipe for the blog before work, watching too much Today Show
X. X-Rays You've Had: I've had x-rays on my neck a few times because I lack the curve that most people have in their neck.
Y. Yummy Food You Make: All on this blog!
Z. Zoo Animal Favorites: It's been so long since I've been to the zoo, but I have always loved the tigers and lions at the zoo.
Wednesday, March 30, 2011
Wedding Shoes
A couple weeks ago, my mom came to do some work on the wedding. We crafted, shopped for decorating supplies and bought my wedding shoes (pictured above)!
Since I'm quite tall (just shy of 5'10) I was serious about buying flats or something with a very, very low heel. Typically, I don't shy away from high heels. Joey is tall (around 6'4) so that's not an issue, but the last thing I wanted was to look back at my wedding photos and see me, towering over everyone else in a white dress.
My mom, however, has never met a flat she likes and a heel she doesn't, so after a bit of debate and a lot of browsing, I landed on a shoe that both of us love. In fact, as the days go by I love my shoes more and more. I know that wedding shoes, for some people, are a huge deal. Brides spend hundreds of dollars on the perfect shoe, but I am not that bride.
These shoes are so unbelievably comfortable, have a sturdy, low heel, and a pearly exterior that compliments the look and feel of my dress.
P.S. - I got a call yesterday that my dress came in! I can hardly wait to go try it on and get the fittings started.
Monday, March 28, 2011
The Puppy Post
Those of you that follow me on Twitter are well aware that last week Joey and I welcomed this little lady into our soon-to-be family. Her name is Nutmeg, and while 4-years-old really isn't a 'puppy' anymore, I have a tendency to call all dogs puppies, no matter the age or size.
Little Nut came to us via Florida, where she was one of four family dogs living with my dad, step-mom and little sisters. She is now the only dog in the house and taking quite well to all the attention.
I sincerely hope you all aren't opposed to the occasional puppy post, because I am quite smitten with this little nut.
Madison
Sunday, March 27, 2011
Spinach-Basil Pesto
What a weekend! One of Joey's groomsmen drove down from Minneapolis to Des Moines for the weekend to spend time with us before the wedding. He travels quite a bit for work and is one hard guy to get a hold of so we were lucky to have a whole weekend with him. Most weekends when Joey and I are together, we tend to go to the same restaurants because we know what we love. But having a guest here this weekend we managed to try three new restaurants in one weekend!
Big thumbs up to Gusto Pizza and Drake Diner. Thumbs down to India Star: delicious Naan but terrible service and average grub aside from the bread. Moving on...
At the end of last week, I found myself with an unusually full fridge. Typically, my fridge looks a little bare, and a messy fridge full of leftovers that won't get eaten drive me crazy. However, I also hate letting food go to waste, so when I found a carton of fresh basil and a bag of spinach on its last leg in my fridge, making pesto was the only thing to do.
My earliest memories of pesto revolved around pricey clam shell containers of herbs in dubious amounts. However, along the way I realized that pesto is pretty much the most economical things you can make. Leftover herbs, leafy greens, nuts and cheese can easily be blended into a pesto paste that is incredibly versatile.
Spinach-Basil Pesto
Ingredients
*2 cups spinach
*1 cup fresh basil
*1/3 cup grated Parmesan cheese
*1/3 cup chopped walnuts
*1 tablespoon lemon juice (optional)
*2 cloves garlic
*Olive oil
*Salt and pepper to taste
Instructions
*In the bowl of a food processor, combine spinach, basil, Parmesan cheese, walnuts, lemon juice and garlic cloves. Process with on-off turns, scraping down the sides of the bowl as necessary, until ingredients are starting to combine.
*With food processor running, drizzle olive oil until desired consistency is reached (about 1/4 to 1/2 cup olive oil).
*Serve tossed into pasta, spread onto bread, as a sandwich spread or dip for veggies.
Happy cooking!
Madison
Friday, March 25, 2011
Weighty Issues
I never really thought I would be someone who had a set of 'before' and 'after' photos to share. But here I am, with said set of photos, talking about my journey to health. For a number of reasons, college really wasn't my favorite stage of life. Growing up I was a habitual early-riser who kept a full schedule of activities and had a gym in my basement. The college routine of late nights, a less than stellar diet and inconsistent exercise didn't suit me. Sure, I knew a lot about fitness and nutrition, but I wasn't really applying to my life or treating my body the way it deserved to be treated.
During my college 'dieting years' I tried to stick to no more than 1,200 to 1,600 calories a day, deriving most of my calories from whole grain carbs, animal proteins and a few fruits and veggies thrown in along the way. I was exercising, and even trained for a half marathon, but was inconsistent with trips to the gym and never bothered to weight train. Slowly, throughout college, my weight crept up to 160 pounds (I'm just shy of 5'10). Although I was by no means unhealthy, I didn't feel like myself and wanted to make a change.
Shortly after college graduation and moving into my own apartment, I made a number of changes to positively impact my health and well-being. My sleep schedule became more regular, I renewed my love for and commitment to exercise (mainly in the form of cardio) and decided to give vegetarianism a try, forcing me to focus on building meals around more veggies, fruits and whole grains.
Most recently (about 6 months ago) I started to incorporate weight training into my fitness routine three to four days a week to build muscle, burn calories and tone my body. The difference I've noticed in my arms and abs in particular is amazing. Between the weight training, vegetarianism, commitment to cardio and increased caloric consumption, the extra pounds fell of. It was as if my metabolism 'light switch' had been turned on. Today, I am no longer in the process of trying to lose weight now that my body has settled at my 'happy weight' of 145 pounds.
I am, by no means, an expert on the subjects of diet, nutrition and fitness, just someone who is passionate about the topics. If you're unsure of how much protein, calories and other nutrients you should be consuming, the USDA has a great website to guide your diet which can be found here.
Here's to living and maintaining a healthy lifestyle!
Madison
During my college 'dieting years' I tried to stick to no more than 1,200 to 1,600 calories a day, deriving most of my calories from whole grain carbs, animal proteins and a few fruits and veggies thrown in along the way. I was exercising, and even trained for a half marathon, but was inconsistent with trips to the gym and never bothered to weight train. Slowly, throughout college, my weight crept up to 160 pounds (I'm just shy of 5'10). Although I was by no means unhealthy, I didn't feel like myself and wanted to make a change.
Shortly after college graduation and moving into my own apartment, I made a number of changes to positively impact my health and well-being. My sleep schedule became more regular, I renewed my love for and commitment to exercise (mainly in the form of cardio) and decided to give vegetarianism a try, forcing me to focus on building meals around more veggies, fruits and whole grains.
{Before: With my cousin, Curtis, in August 2007}
{After: With Joey in March, 2011}
Within a few months, I started to see results. My vegetarian 'experiment' turned into a full-blown lifestyle, my energy levels increased and I started to see a few pounds disappear. Before long I realized not only was I consuming more fruits and veggies, I was eating more calories, too. Instead of eating according to calories, I had started to listen more to my body and what it needed to feel happy and satisfied.
Most recently (about 6 months ago) I started to incorporate weight training into my fitness routine three to four days a week to build muscle, burn calories and tone my body. The difference I've noticed in my arms and abs in particular is amazing. Between the weight training, vegetarianism, commitment to cardio and increased caloric consumption, the extra pounds fell of. It was as if my metabolism 'light switch' had been turned on. Today, I am no longer in the process of trying to lose weight now that my body has settled at my 'happy weight' of 145 pounds.
I am, by no means, an expert on the subjects of diet, nutrition and fitness, just someone who is passionate about the topics. If you're unsure of how much protein, calories and other nutrients you should be consuming, the USDA has a great website to guide your diet which can be found here.
Here's to living and maintaining a healthy lifestyle!
Madison
Thursday, March 24, 2011
Thankful
I've said it before, and I'll say it again. I am blown away by you all. Your kindness and generosity in light of recent events blew me away, and I'm thrilled to say that together we raised $230 for the Red Cross to go towards disaster relief in Japan!
Thank you, so much, to everyone who donated and placed bids on these baked goods. I will be contacting winners today to get the ball rolling. The winners are:
My Nutella Chocolate Chip Cookies: Kate for $40
Sarah's Oreo Cheesecake Cookies: Lauren for $25
Kristina's Spring Flower Sugar Cookies: Monica for $25
Marilyn's Oatmeal Raisin Cookies: Joni for $65
Lauren's Chocolate Chip Cookie Dough Bars: Monica for $50
Kristen's Chocolate Chip, Toasted Pecan and Dried Cranberry Cookies: Jennifer for $25
Back tomorrow with a breakfast recipe you need to try this weekend!
Madison
Monday, March 21, 2011
Blog Bake Sale for Disaster Relief
Can I be completely honest with you?
I've been more than a little nervous about this blog bake sale. It's my first attempt at anything of the sort, dependent on the generosity of the readers of Espresso and Cream. I was more than a bit afraid that it was a silly idea, that no one would be interested in donating or bidding on the baked goods donated. But when some of my awesome readers volunteered their baking expertise with such enthusiasm, I realized it was totally worthwhile.
Here is what you need to know. Bidding is now open and will go until Wednesday, March 23rd at 10 p.m. Bids for each item will start at $15 with 100% of the proceeds going to the American Red Cross for disaster relief in Japan. If you're interested in bidding on one of the items listed below, send me an e-mail (madisonjanemayberry@gmail.com) letting me know how much you would like to bid and on which item. I'll update the blog as often as possible to let you know where the bids are at and will announce the winning bidders on Thursday, March 24th!
Winning bidders will be contacted within the week about where they would like their baked goods sent and how payments can be made.
Thank you so much in advance for your generosity, support and willingness to help a country in such great need of our help right now.
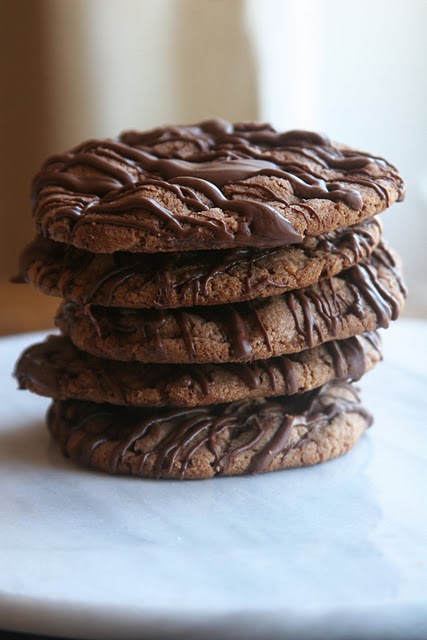
I wanted to kick this bake sale off by donating two dozen of my favorite Nutella Chocolate Chip Cookies. They're chewy and crispy at the same time and the chocolate drizzle puts them over the edge of deliciousness.
BID: $40.00
Sarah over at Dragonfly Nurse is donating two dozen of her Mint Oreo Cheesecake Cookies. I'll be the first to admit that I've never even attempted to bake a cheesecake. The whole process just scares me! So cookies like these would really come in handy.
BID: $25.00
I wish I was as creative as Kristina from Kristina's Confections. She is donating a dozen of these Spring Flower Sugar Cookies for one lucky bidder. This picture alone is enough for me pull out my pastry bag and get to working on my piped flower skills.
BID: $25.00
BID: $65.00
Lauren from Keep It Sweet is donating a pan of her Chocolate Chip Cookie Dough Bars. Amazing, right? Lauren is an outstanding baker and creates the most wonderful desserts on her blog. I'm positive these won't disappoint!
BID: $50.00
Kristen from Chocolate Covered Kristen is donating a batch of her Chocolate Chip, Toasted Pecan and Dried Cranberry Cookies. This is one hearty cookie, packed with all sorts of delicious ingredients. This girl doesn't skimp on ingredients, either. It's only the best - Ghiradelli - for these babies.
BID: $25.00
Sunday, March 20, 2011
Roasted Garlic Bread
When I was sick a couple weeks back, my love for bread and butter was renewed. Bagels, English muffins, toast, the only thing I really wanted to eat was toasted bread and butter in various forms. Typically, I steer clear of bread and pasta that aren't of the whole wheat variety. But as I learned while I was laying on the couch, unable to cook anything else, I realized that sometimes nothing but good old white bread will cut it.
Growing up, we never ate much garlic bread. Actually, come to think about it, I don't think my mom ever made garlic bread for dinner, which is probably why I never really developed a taste for the stuff. Maybe it has more to do with the fact that most garlic bread is made with either garlic powder, which always comes off as overly salty and slightly artificial.
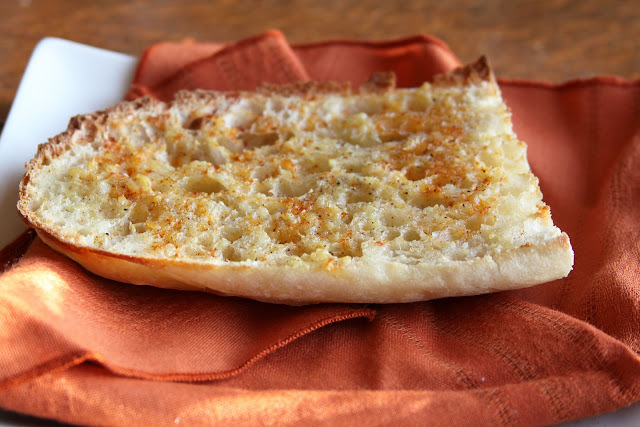
So when I found myself with a baguette and a head of garlic I thought it was high time to give garlic bread a bit of an upgrade. Roasted garlic mixed with creamy butter, spread atop bread and topped with coarse salt, fresh cracked pepper and smoky paprika.
If you're new to roasting garlic, be prepared for a treat. It's amazing what a drizzle of olive oil and 40 minutes in the oven can do for a humble clove of garlic, and in turn, a loaf of bread. Instead of giving off a sharp, pungent flavor, roasting garlic creates a rich, sweet paste that can be spread onto crackers or bread.
Roasted Garlic Bread
Ingredients
*1 medium-size baguette or ciabatta loaf, halved lengthwise
*1 head garlic
*Olive oil
*3 Tbsp. butter, softened
*Kosher salt
*Black pepper
*Paprika (optional)
Instructions
*Preheat oven to 450°F.
*With papery skin intact, cut the top 1/4 portion off the top (skinnier end) of the garlic head, exposing some of the garlic cloves inside. Drizzle garlic with olive oil and wrap completely in aluminum foil.
*Place foil packet in the oven and roast for 35 to 40 minutes, until garlic is golden brown and soft. Remove from oven and cool until able to be handled, about 15 to 20 minutes.
*Squeeze garlic cloves out onto a plate. Discard papery skin. With a fork, mash the garlic until smooth. Stir garlic and butter together until well combined.
*Spread garlic butter onto bread halves. Sprinkle lightly with salt, pepper and paprika, if desired. Bake on a baking sheet for an additional 10 to 15 minutes, or until bread is golden brown and slightly crisp. Slice and serve immediately.
Happy cooking!
Madison
Friday, March 18, 2011
High Protein Health-Nut Banana Bread
I'm always looking for ways to incorporate more protein into each meal and snack I eat. After becoming vegetarian, I knew that finding new protein sources was going to be crucial to my success. Each day I try to drink a protein shake filled with fruit, Greek yogurt flies out of the refrigerator, and I go through peanut butter faster than I want to admit.
And although I enjoy scrambled eggs for lunch or dinner quite often, I can never get myself to eat them for breakfast. It's got to be on the sweet side for me, without causing a whole bunch of guilt and a sugar crash after. That's where this banana bread comes into the picture.
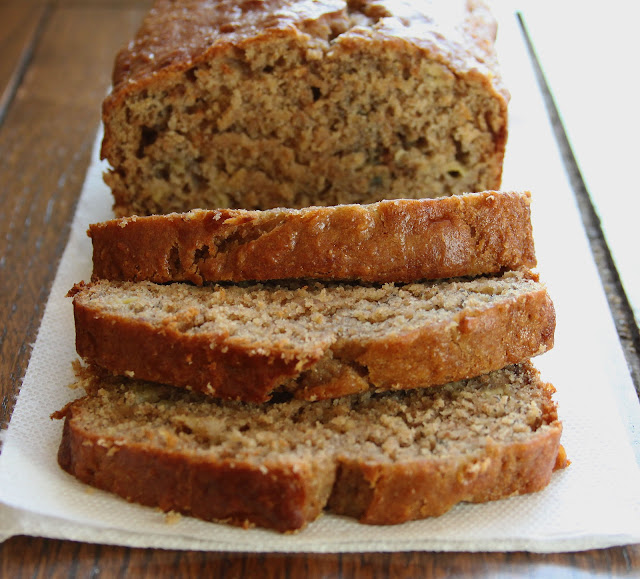
Yes, another banana bread, despite the fact that there are already two recipes for it on the site. But this bread is delicious and healthy. It's not your grandmother's banana bread. No, it's filled with yogurt, protein powder, flax seed, whole wheat flour and peanut butter for a hearty dose of protein and fiber. And with only a 1/2 cup of sugar in the entire loaf, it has a mildly sweet flavor that won't weigh you down.
High Protein Health-Nut Banana Bread
Ingredients
*3 medium ripe bananas, mashed
*5 tablespoons butter, melted
*1/3 cup low-fat vanilla yogurt (I use Dannon Light and Fit)
*35-40 grams vanilla-flavored protein powder (I use Pure Protein Vanilla Whey Protein)
*1/4 cup sugar
*1/4 cub brown sugar
*2 large eggs
*1 teaspoon baking soda
*1/4 teaspoon salt
*1 teaspoon vanilla extract
*1 teaspoon ground cinnamon
*1/4 cup ground flax meal
*1/2 cup all-purpose flour
*3/4 cup whole wheat flour
*2 tablespoons creamy peanut butter
*2 tablespoons milk
Instructions
*Preheat oven to 350°F. Line a 9x5-inch loaf pan with aluminum foil; set aside.
*In a large bowl, beat together the bananas, butter, yogurt, protein powder, sugar, brown sugar and eggs. Beat until well combined. Add in baking soda, salt vanilla extract, cinnamon and flax meal. Stir until combined.
*Beat in flours until just combined. Reserve 1/2 cup of the batter. Transfer remaining batter to loaf pan. Stir peanut butter and milk into the reserved batter and stir until combined. Spread peanut butter batter atop batter in loaf pan. Run a knife through to evenly distribute peanut butter batter layer.
*Bake for 50 minutes, until golden brown on the surface. Transfer to a wire rack to cool.
Happy baking!
Madison
Labels:
banana bread,
Bananas,
breakfast
Wednesday, March 16, 2011
Time For Travel
Whirlwind 48 hours of travel for work: Check.
Managing to stay well-hydrated and getting the recommended servings of fruits and veggies both days: Check. (Thank you CIBO Express and the great little vegetarian-friendly restaurant in the Minneapolis airport!)
Coming home and trying a new recipe, only to have it fail: Check.
Back to the drawing board. Hope you enjoy these little snippets from my trip.
Madison
Tuesday, March 15, 2011
Brown Butter Angel Hair Pasta
Note: In light of the recent tragedies in Japan, I am thinking of putting together a virtual bake sale with the proceeds going to disaster relief. If this is something you would be interested in participating in, please send me an e-mail (madisonjanemayberry@gmail.com) so I can gauge interest.
Daylight savings time and a hectic week are really cramping my photo schedule. So instead of bathing my recipes in morning light, I'm photographing my recipe under artificial light in my pajamas at 5:45 in the morning. It's a glamorous life, indeed.
But if you can manage to look past the bad lighting, this recipe is a true gem. Ever since reader Colleen said her favorite comfort food was spaghetti with Parmesan cheese and bread crumbs, I had the idea for this pasta on my mind. Pasta, dressed with a delicate, savory browned butter sauce. Peppered with notes of sage and salty Parmesan cheese.
Health food? No. A divine indulgence? You better believe it.
Brown Butter Angel Hair Pasta
Be careful not to over brown the butter. A couple more minutes after the butter is melted should be enough to give you the flavor and color you're looking for.
Ingredients
*2 oz (1 serving) angel hair pasta
*3 Tbsp. salted butter
*Kosher salt
*1/8 tsp. rubbed sage
*Grated Parmesan cheese
Instructions
*Prepare pasta according to package directions. Drain and keep warm.
*In a small saucepan, melt butter over medium-low heat. Once melted, continue to cook, swirling frequently, until butter begins to brown and turns a light amber color, about 2 to 3 minutes. Remove from heat and stir in salt to taste, the sage and 1/2 tsp. Parmesan cheese. Stir to combine.
*Pour butter sauce over pasta and sprinkle with additional Parmesan cheese and kosher salt, if desired.
Happy cooking!
Madison
Monday, March 14, 2011
Leaving On a Jet Plane...
Man this week is busy! I'm taking a quick work trip over the next couple days and to keep you all occupied in my absence, I'm sharing this lame little video Joey and I made last weekend after a day of home renovation work in Chicago. Please excuse the crazy hair and dark roots.
Hey, a little video is better than no video at all, right? I'm second guessing that logic right now.
Madison
HGTV Here We Come
First of all, thanks to all of you who entered the gift card giveaway! I was blown away by all the responses and left with a serious craving for comfort food. I'm thinking there might need to be a comfort food week on Espresso and Cream sometime soon.
The winner of the giveaway is Sarah Crosby (comment #43)! Please e-mail me (madisonjanemayberry@gmail.com) with your address and I will get your gift card in the mail.
In other news, Joey and I spent the weekend in Chicago, where Joey's sister and brother-in-law live, working on home renovations projects on the house they just bought. It was a paint-filled weekend spent with Joey's family, and I'm so excited to see how the house turns out.
We also managed to get cleaned up for a dinner out with the rest of Joey's family. It was such a wonderful weekend and a reminder of how blessed we are to have such amazing families.
Madison
The winner of the giveaway is Sarah Crosby (comment #43)! Please e-mail me (madisonjanemayberry@gmail.com) with your address and I will get your gift card in the mail.
In other news, Joey and I spent the weekend in Chicago, where Joey's sister and brother-in-law live, working on home renovations projects on the house they just bought. It was a paint-filled weekend spent with Joey's family, and I'm so excited to see how the house turns out.
We also managed to get cleaned up for a dinner out with the rest of Joey's family. It was such a wonderful weekend and a reminder of how blessed we are to have such amazing families.
Thursday, March 10, 2011
Gift Card Giveaway
If you are anything like me, you are in love with Williams-Sonoma. Really, how can you not be? It seems like every time I walk into that store, I leave realizing there are about a hundred things I don't have in my kitchen that I need.
Alas, my eyes are bigger than my tiny apartment kitchen so I usually stick to window-shopping and browsing. Doing a lot of oooh-ing and ahh-ing along the way.
Maybe I should get to the point. Today, because I love you all so much and I'm very thankful for your readership and when my blog makes money I like to give back. And because I'm guessing we could all use a little more sunshine in our lives during the month of March, I'm giving away a $25 gift card to Williams-Sonoma!
To enter, leave a comment below before Sunday, March 13 at 10 p.m., answering the following question:
What is your ultimate comfort food?
Wednesday, March 9, 2011
Fluffer-Nutter Bars
It has come to my knowledge that there is something called a fluffernutter sandwich. I had heard of such a sandwich before, but was never quite sure if it really existed or if it was just an urban myth. Most certainly no such sandwich was part of my childhood, but then again, I didn't eat my first peanut butter and jelly sandwich until I was in 7th grade. I was a strange kid.
So to satisfy my curiosity, I got to digging around on the internet. And, of course, Wikipedia came to the rescue with this answer:
"A fluffernutter sandwich is a sandwich made with peanut butter and marshmallow creme. It's name comes from the popular Marshmallow Fluff brand of marshmallow creme. It is particularly popular in the Northeastern United States and has been proposed as the state sandwich of Massachusetts."
Who knew? Personally, marshmallow creme was a phenomenon I knew very little about first-hand. And although I love peanut butter, this sandwich sounded a lot more like a dessert to me than a viable lunch or dinner option.
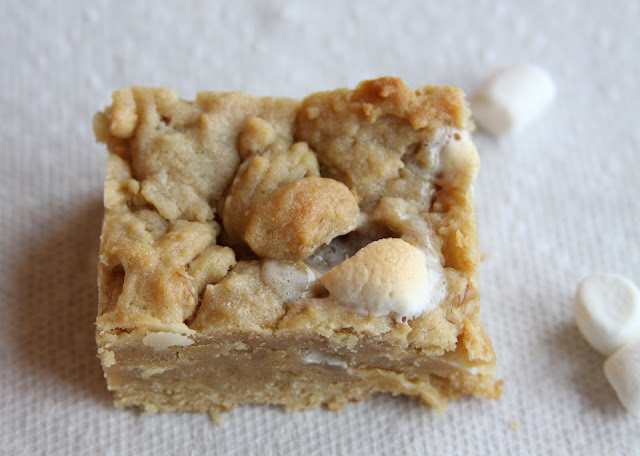
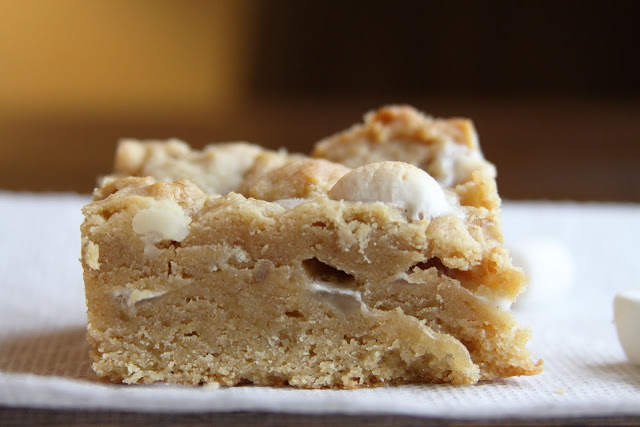
Fluffernutter sandwiches may have zero appeal to me, but rolling all that sweet goodness into one gooey, caramel bar sounded like a very good idea. I based the bars off a recipe for Peanut Butter and Jelly Bars from the most recent issue of Bon Appétit. The base is very similar to a blondie. A blondie that is filled with a marshmallow center, which is surprisingly delicious. I might go so far to say that these are one of the best desserts on the entire site. But I'll let you be the judge of that.
Fluffer-Nutter Bars
Adapted from Bon Appetit, March 2011, Peanut Butter and Jelly Bars
Ingredients
*1 1/2 cups all-purpose flour
*1/2 teaspoon baking powder
*1/4 cup creamy peanut butter
*3/4 cup packed brown sugar
*1/2 cup (1 stick) butter, softened
*2 large eggs
*1/2 teaspoon kosher salt
*1 cup mini marshmallows
*1/4 cup chopped walnuts
Instructions
*Preheat oven to 350°F. Line an 8x8x2-inch baking pan with aluminum foil. Set aside.
*In a medium bowl, combine the flour and baking powder. Set aside. In a second bowl, beat together the peanut butter, brown sugar and butter until well-combined. Whisk in the eggs, one by one, followed by the kosher salt.
*Reserve 1/2 cup of the dough. Transfer the remaining dough to the lined baking pan and press into the bottom of the pan and 1-inch up the sides. Sprinkle the marshmallows atop the dough in pan, spreading in an even layer.
*With reserved 1/2 cup of dough, stir in the walnuts. With your fingers, drop the dough mixture atop the marshmallow layer in grape-sized pieces. (This doesn't have to be a completely even layer. You should still be able to see some of the marshmallows.)
*Bake for 30 minutes, or until top is golden brown and marshmallows are puffed. The bars may not seem done because of the marshmallow layer, but that is no cause to worry.
*Transfer to a wire rack and cool for at least 30 minutes before cutting into bars. Makes 9 Bars
Happy Baking!
Madison
Labels:
bars,
dessert,
marshmallows,
peanut butter
Tuesday, March 8, 2011
A Day In The Life: Tuesday's Eats
It's been a while since I've shared a little look into what my daily eats look like. Between my six mile run yesterday, lifting and my five mile run today, I've been one hungry girl! Mornings start pretty early in my apartment (I'm usually up and making breakfast between 5 and 5:30) and I find myself needing to snack on something every couple of hours to prevent a total blood sugar crash.
Breakfast
*16 oz. water
*Cup of coffee with 2% milk and a tablespoon of International Delight Breve Creme
*2 slices whole wheat toast with butter
*Fage 2% Greek Yogurt with 1/2 cup of fresh raspberries (so expensive right now!)
Lunch
*2/3 cup Kellogg's All Bran cereal (new favorite) with a cup of 2% milk
*Dannon Light & Fit yogurt with 1/2 cup fresh raspberries
*8 oz. water
*Cup of Trader Joe's Peppermint Tea
Afternoon Snack
*Small apple
*Medium latte from Caribou Coffee (a treat from my awesome co-worker!)
Dinner
*Ran by Jimmy John's (which I rarely do during the week) and grabbed a #6 (vegetarian) sub without mayo and triple Dijon
*6 oz. Dannon Light & Fit yogurt with 1/4 cup chopped walnuts and a tablespoon of ground flax seed
*Small apple with a tablespoon of peanut butter
*16 oz. water
Post-Workout Snack
*Smoothie made with vanilla whey protein powder, 2% milk, peanut butter and ice
Happy eating!
Madison
Breakfast Roundup
After being sick with the flu a couple weeks back and eating nothing but buttered toast and bagels for four days straight, I couldn't wait to get back into a varied, tasty breakfast routine. Believe it or not, it took me a full week and a half for me to crave coffee and pancakes again! If you're looking to shake up your breakfast, here's a great place to start:
Madison
Sunday, March 6, 2011
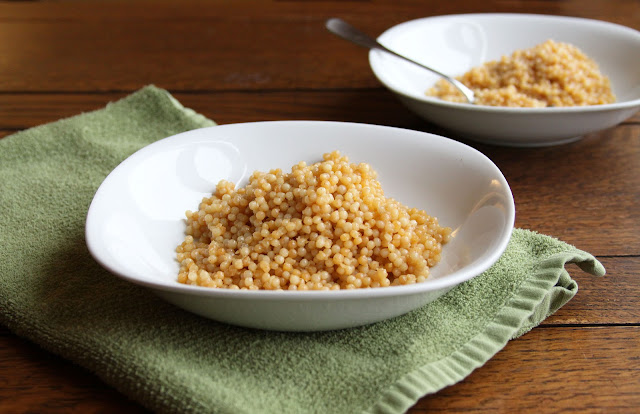
Lemon Parmesan Israeli Couscous
When I was in college, one of the most wonderful things about going home was knowing that my mom would have a wonderful meal waiting for my arrival. After driving four hours, usually at night after class, there was nothing better than sitting down to a big bowl of hot beef stew with her famous buttermilk biscuits.
So when my mom let me know she was going to visit me this weekend to work on wedding crafts, I knew I needed to return the favor and get to cooking something for dinner. For weeks now, I've had a box of Israeli (aka 'pearl) couscous from Trader Joe's in my pantry and thought this would be the perfect excuse to experiment with a new-to-me ingredient.
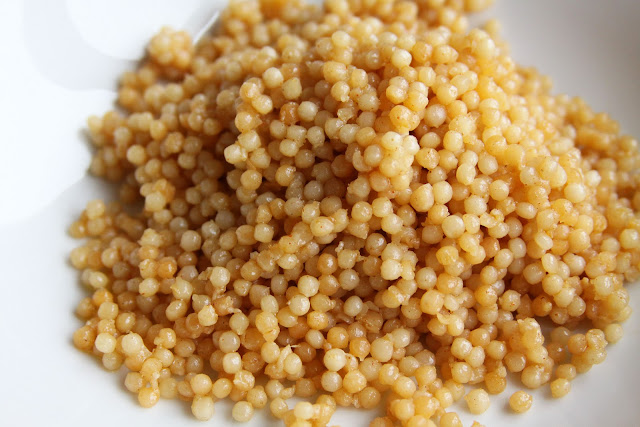
I've eaten Israeli couscous a number of times and fell in love with the chewy, dense texture that's a cross between brown rice and pasta. Thankfully, my mom likes to cook and eat simply, so I kept it beautifully basic. A little garlic, paprika, cooked in low-sodium vegetable broth to enhance the flavor, then topped with grated Parmesan cheese, lemon and olive oil.
Lemon Parmesan Israeli Couscous
Ingredients
*1 tablespoon olive oil
*1 clove garlic, chopped
*1/2 tsp. paprika
*1 1/3 cups Israeli (pearl) couscous
*2 cups low-sodium vegetable or chicken broth
*1/4 cup grated Parmesan cheese
*1/2 a lemon
*Additional olive oil
Instructions
*Bring the broth to boiling in a small sauce pan.
*Meanwhile, heat the olive oil in a large sauce pan over medium heat. Add in the garlic, paprika and the couscous. Cook, stirring frequently, 3 to 4 minutes, or until cous cous is slightly browned and the garlic is fragrant.
*Add in the boiling broth to the couscous mixture. Cover and simmer over low heat for 8 to 10 minutes, until couscous and chewy and tender and almost all the broth is absorbed.
*Remove from heat and stir in the Parmesan cheese, a drizzle of fresh lemon juice and a drizzle of olive oil.
Happy cooking!
Madison
Thursday, March 3, 2011
Breakfast Muffies
You know those special pans you can buy at specialty cooking stores that are designed to help you create muffin tops or 'muffies'? Yeah, I don't have one of those pans, but I am most certainly a fan of muffin tops.
Unless we're talking about muffin tops above your jeans. Definitely not a fan of those.
The good news about these muffies? They won't give you a muffin top. In fact, they're actually quite healthy, made with mashed bananas, whole wheat flour, oats, and a little butter and sugar. If you're a fan of soft, fluffy, cake-like cookie-muffins then these are for you.
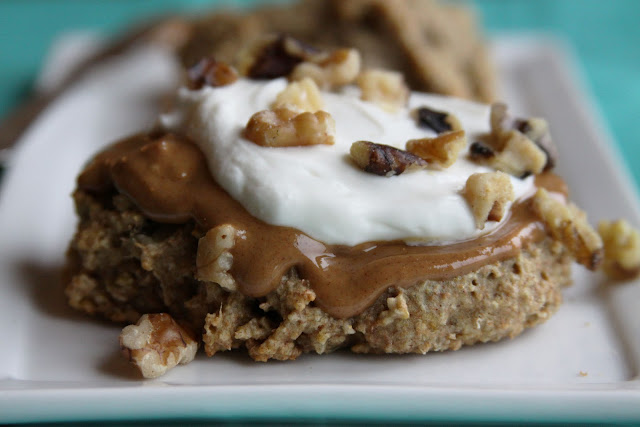
Of course, a single muffie on its own isn't enough to keep me full all morning, so I dressed mine up this morning with a smear of creamy peanut butter and a dollop of Greek yogurt. A divine way to start the morning, indeed.
Breakfast Muffies
This recipe calls for oat flour, which is incredibly easy to make. Just place 1 1/2 to 2 cups of regular rolled oats in a food processor and process for about a minute, until the oats form a finely ground meal. Use as you would flour!
Ingredients
*1 cup oat flour (see note, above)
*3/4 cup whole wheat flour
*1/4 tsp. baking powder
*3/4 tsp. baking soda
*1/4 tsp. salt
*1/2 tsp. ground cinnamon
*3 very ripe bananas, mashed
*1 large egg
*1/3 cup sugar
*2 1/2 Tbsp. butter, melted
*1/2 cup chopped walnuts
Instructions
*Preheat oven to 350°F. Line a baking sheet with parchment paper or lightly grease with non stick cooking spray.
*In a small bowl, combine the oat flour, whole wheat flour, baking powder, baking soda, salt and ground cinnamon. Set aside.
*In a large mixing bowl, combine the bananas, egg, sugar and butter. Stir until well combined. Add the dry ingredients to the wet ingredients, stirring until just combined. Stir in chopped walnuts.
*Drop by heaping tablespoons onto baking sheet, about 2 inches apart. Bake for 10 to 12 minutes, until cookies are lightly golden around the edges and puffed. Remove and transfer to wire rack to cool. Makes 10 muffies
Nutritional Facts per muffie: (estimated from SparkRecipes) 191 cal., 8.2 g fat (2.6 sat. fat), 26 mg chol., 109 mg. sodium, 27 g carb., 3.2 g dietary fiber, 11 g sugar, 4.4 g protein. 239 g potassium
Happy Baking!
Madison
Labels:
banana bread,
breakfast,
muffies,
muffins
Tuesday, March 1, 2011
Wacky for Wedding Hair
I've know that lately I've been pretty quiet on the wedding front. So quiet, in fact, that maybe you forgot it's happening all together. Not to worry, it's still on. It's just that after thinking it over, I decided that I wanted the big day to be special and filled with lots of surprises for our guests, so the detail-sharing has been staying under wraps for the most part.
But today, I felt like talking wedding hair, since it seems to be the detail I think most about.
Lately I've been wearing my hair up for work almost every day. It's gotten to this point because I'm growing it out for that event in July called our wedding. Knowing that my dress is very classic with a beautiful back, I am sure that I want to wear my hair up. That, and the fact that I hate a bad hair day and wearing my hair down for hours in the middle of July is pretty much a recipe for disaster in my book.
Last month I met with the creator of my bridal 'do' so we could chat. I wanted to make sure she was aware of what I was hoping to achieve - and that it was, indeed, realistic. No fussy, tight, slicked-back hair for me. I'm hoping for something soft and romantic that hits at the nape of my neck.
Here are a few shots that have inspired me lately. (I'm sorry, I lost track of where I pulled all these from. Most likely StyleMePretty.com) Which is YOUR favorite?

